REVIEW · AORAKI MOUNT COOK NATIONAL PARK TE WAHIPOUNAMU
The Adventurer: Tasman Glacier Heli-hike
Book on Viator →Operated by Mt Cook Glacier Guiding · Bookable on Viator
This is one of the few ways to reach the Tasman Glacier fast. You get two helicopter flights plus a real guided glacier hike near Mount Cook’s Aoraki region, so the views and the walking both feel like a proper adventure. You’re also in a small group (max 11), which makes it easier to get help with gear and stay confident on the ice.
What I like most is that you’re not left to figure it out on your own. You’ll get warm provided gear (boots, wool socks, waterproof layers) and a professional guide who leads the hike step-by-step, using glacier techniques that keep things safe. The main consideration is that this experience is weather-dependent and the helicopter schedule is strict, so you need to be on time and ready to roll with changes.
In This Review
- Key highlights
- Why a helicopter glacier hike is the smart way to do the Tasman
- From Mount Cook Airport to a high Tasman landing
- Glacier gear: what you get (and what you still need)
- The helicopter landing and safety briefing (how the guide sets you up)
- On the ice: crampons, step-cutting, and the rhythm of the hike
- Ice caves, tunnels, and the coolest glacier moments
- Time in the air on the way back: the return flight’s payoff
- Price and value: what you’re really paying for
- Weather plans: the part you can’t control, but can manage
- Who this Tasman Glacier heli-hike fits best
- Should you book the Tasman Glacier Heli-hike?
- FAQ
- How long is the Tasman Glacier Heli-hike?
- Where does the tour start and end?
- What’s included in the price?
- What should I bring for the hike?
- Do I need crampons or snow shoes?
- How big is the group?
- What weather conditions are required?
- What if I miss my departure time?
- Is there an age or fitness requirement?
- Can I cancel for a full refund?
Key highlights
- Two scenic helicopter flights for the trip in and the return flight over the Aoraki/Mt. Cook area
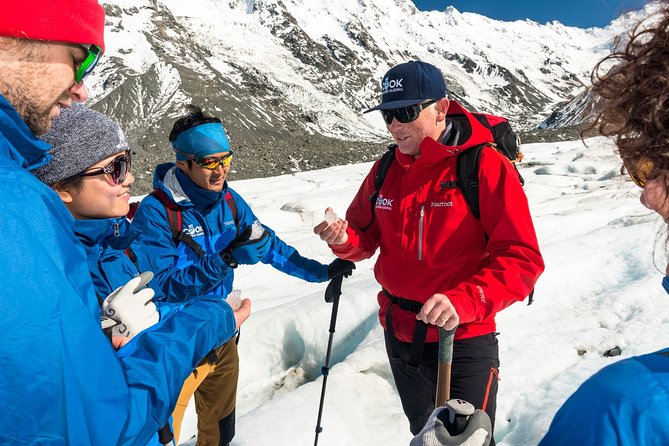
- Provided boots, wool socks, and waterproof outerwear so you can dress for altitude and cold
- Crampons or snow shoes fitted on arrival, with walking poles included
- Small group size (up to 11) for more guide attention on the glacier
- Glacier-guiding skills in action as your guide cuts steps for safe footing
- Plenty of time to look and photograph while still keeping the hike moving
Why a helicopter glacier hike is the smart way to do the Tasman
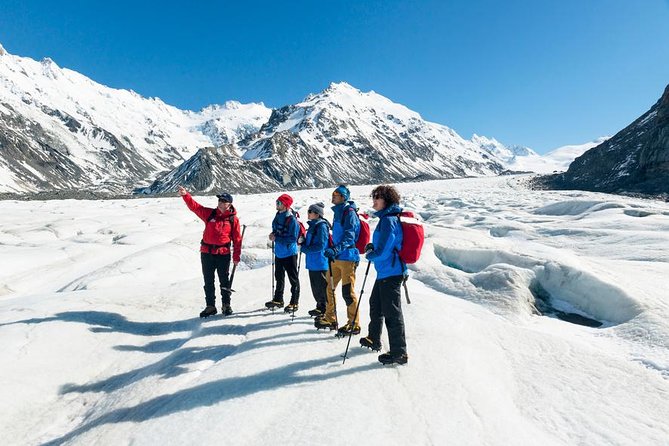
A glacier hike sounds simple until you try to reach one. The Tasman Glacier is remote, icy, and serious enough that “just walk over” isn’t a plan. This heli-hike solves the biggest problem: it gets you high onto the ice without the long overland slog, so your time stays focused on the glacier itself.
You also get the best kind of extra: the flying. The helicopter time isn’t just transport. It’s part of the experience, with big views of New Zealand’s highest peak area (Aoraki/Mt. Cook) and dramatic glacier formations from above. In a few hours, you see the ice two ways: from the air, then close up.
The other reason I like this format is control. A professional guide runs the day, fits your gear, and leads you across the glacier terrain. That matters if you want adventure without guessing at what comes next.
You can also read our reviews of more tours and experiences in Aoraki Mount Cook National Park Te Wahipounamu.
From Mount Cook Airport to a high Tasman landing
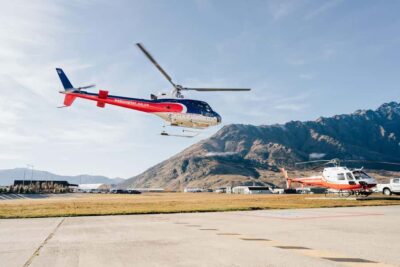
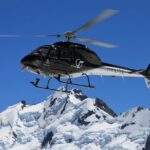
The day starts at Mount Cook Airport, on Mount Cook Road (Canterbury Region 7999). You’ll fly from there to a remote part of Tasman Glacier, landing high on the ice. Your itinerary is built around two helicopter rides—so if you’re the type who enjoys photos in motion, you’re in the right place.
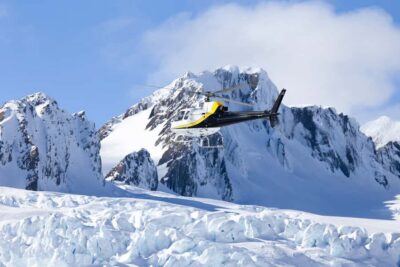
Most days also include a spectacular fly-by of Aoraki/Mt. Cook during the flights. The result is that you’re not stuck watching the glacier only from ground level. You’ll get that “how is this real?” feeling from the air—wide angles, big height, and a sense of scale that’s hard to replicate any other way.
Group size is capped at 11, and multiple reviews mention how seating was handled. People report getting window or front-seat views when possible, so it’s worth showing up ready and settled early. If you care about views, that’s one practical way to maximize the helicopter portion.
Glacier gear: what you get (and what you still need)
This is one of the best-value parts of the tour—because fitting you correctly is the whole safety plan. You’ll be provided quality leather boots and woolen socks, plus a harness if required. You’ll also get a waterproof jacket and over-trousers, and crampons (and/or snow shoes in winter). Adjustable walking poles are included too.
What you should bring is mostly about layering and comfort:
- 3–4 layers for your upper body
- Warm trousers (no jeans)
- Sunglasses and sun protection
- Hat and gloves
- Drink and snacks
- Your mobile ticket
One small but important practical note: no jeans. Jeans hold cold and don’t work well for wet, windy, and crampon-friendly conditions. Warm trousers give you flexibility and help keep you comfortable while you’re standing still for gear fitting and moving on uneven ice.
If you’re wondering whether you’ll be cold even with the provided layers—plan for yes. The glacier is cold, and altitude adds to it. The good news is you’re set up with waterproof outerwear and foot protection, so your job is mainly to dress smart underneath.
The helicopter landing and safety briefing (how the guide sets you up)
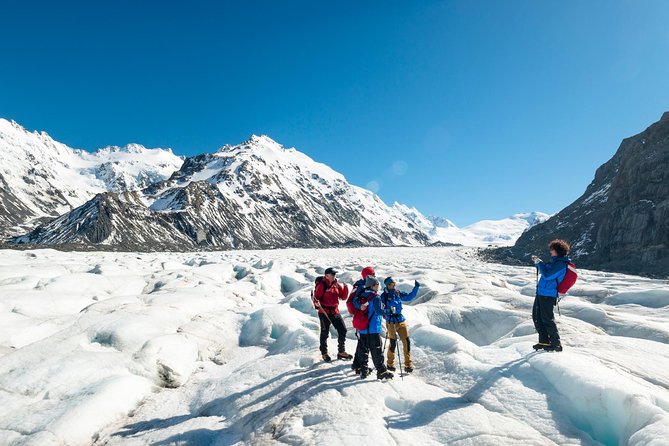
Once you land, the process becomes very hands-on. You’ll have your crampons or snow shoes fitted, and then you’ll head out with your guide. The guide also sets expectations early: how to walk, how to move safely, and what to do when stopping for photos.
From the reviews, the tone is consistent: clear instructions, careful behavior on the ice, and a focus on safety without turning the day into a lecture. Guides also make the walk feel fun and manageable, even if you’ve never stepped into a glacier environment before.
If you need extra reassurance, this tour tends to deliver it. People specifically mention that their guides were attentive and that they were given time for photos. That combination matters: if you’re nervous, you get guided confidence; if you’re excited, you get the moments that make it worth paying for.
On the ice: crampons, step-cutting, and the rhythm of the hike
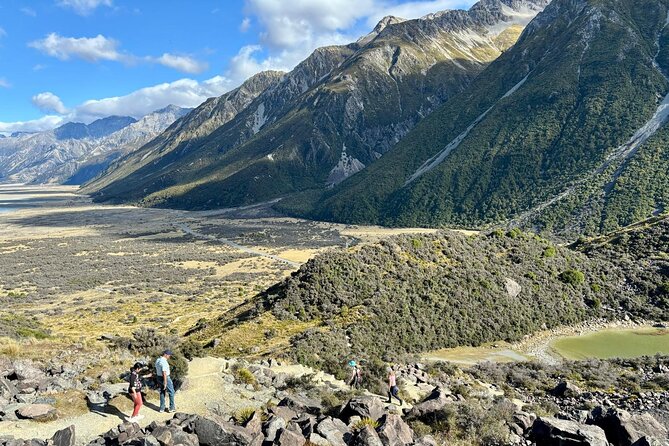
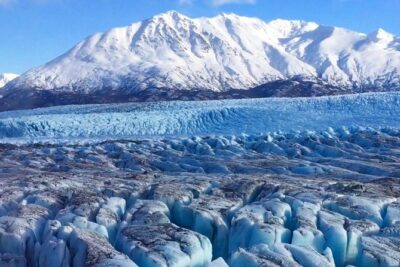
The actual hike happens on glacier terrain around 4,265 ft (1,300 mt.). That elevation and the icy surface mean you’ll move carefully. Your guide follows established glacier methods—using skills handed down from New Zealand mountain pioneers—and you’ll often see them cutting steps to help everyone move efficiently and safely.
Crampons (or snow shoes in winter) change how the glacier “feels.” You’re not just walking on slippery snow—you’re walking on traction gear designed for ice. The guide’s job is to make that traction work with your stride, your balance, and your pace.
Your fitness requirement is listed as moderate physical fitness. That doesn’t mean it’s a workout gym session. It means you should be able to handle cold, time on your feet, and walking on uneven ground with attention to balance.
A practical tip: slow down mentally. Glacier steps are deliberate. If you treat it like a normal trail hike, you’ll rush and tire yourself out faster than you expect. Follow your guide’s pace, take the pauses for photos, and keep your legs loose.
Ice caves, tunnels, and the coolest glacier moments
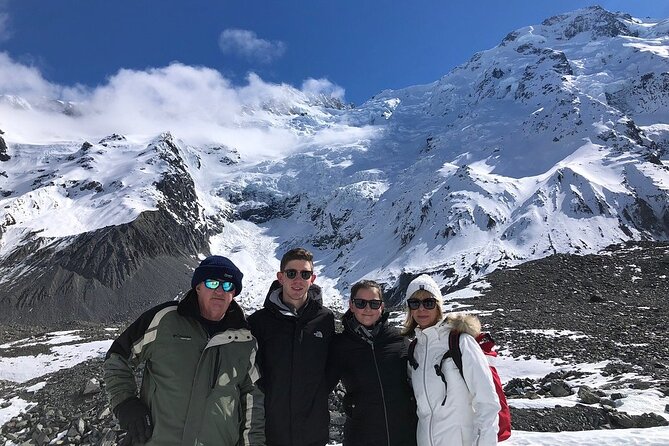
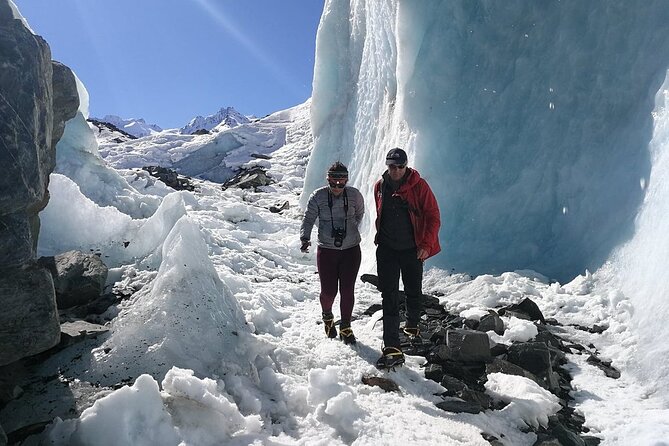
This tour is sold as a guided glacier hike exploring ice formations and remote snow fields, and that’s where the magic shows up. Based on what people describe, you might see features like ice caves or an ice tunnel, and you may get to explore small glacier “pocket” areas where the colors and textures look unreal.
Some reviews go even further into specifics—like short descents into blue-white holes, and moments where water and ice features become part of the day’s story. One traveler even mentioned making a slushie with glacier ice, and another said they drank glacier water.
Now, here’s the balanced way to think about it: those are examples of what can happen with your guide’s route choices and the day’s ice conditions. Don’t bank on one exact feature. Do bank on this: your guide will look for interesting formations and give you time to see them close up and photograph them.
The biggest value isn’t just the “wow” factor. It’s the interpretation. When you’re on a glacier, the formations can look like random ice art. A good guide helps you understand what you’re seeing—why it looks that way, what’s happening on the surface, and what to watch for as you move.
Time in the air on the way back: the return flight’s payoff
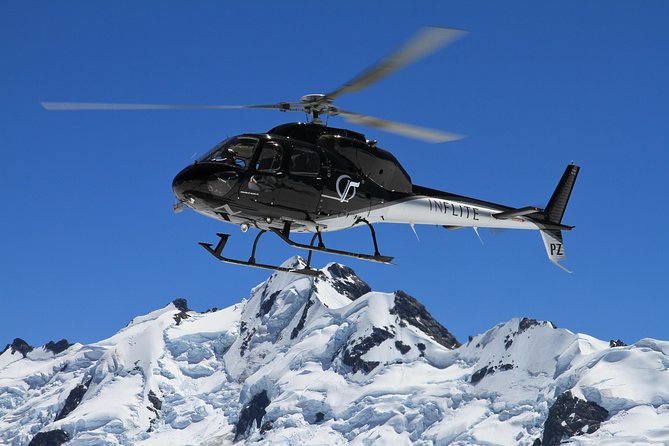
After the glacier portion, you wrap up with another scenic flight back to the Mt. Cook base. This second helicopter ride is often where the day feels like it truly landed in your memory. From the air, glaciers and mountains become patterns—wide, clean shapes that make you understand the scale.
Some people mention close fly-bys of glacier or mountainside faces, and that’s exactly the kind of detail that makes a heli component worth the price. It’s not just about getting you from A to B. It’s about making the whole trip feel like one continuous experience.
If you’re the type who likes to compare views, pay attention on the return flight. You’ll likely see from above what you were standing beside on the ice—edges, texture changes, and how the glacier sits in the broader Aoraki/Mt. Cook region.
Price and value: what you’re really paying for
At $572.23 per person, this isn’t a budget activity. You’re paying for the helicopter access, the guided glacier expertise, and the cold-weather setup that keeps you safe in a harsh environment.
Here’s what makes it feel like value instead of just expensive:
- You get two flights, not one, and both are part of the scenery.
- You’re provided key gear—boots, wool socks, waterproof outerwear, and crampons/snow shoes. That’s not just convenience; it’s part of safety.
- You’re in a capped group size, which generally improves how smoothly the day runs.
- You’re not doing a basic walk. You’re hiking on glacier terrain at altitude with step-cutting and guidance.
If you’re comparing it to other glacier activities, the key question to ask is simple: do you want access to the ice without a long grind? If yes, this heli-hike pays for itself in time and energy. You show up, gear up, and spend your limited vacation hours on the glacier instead of on a remote road or long approach.
Weather plans: the part you can’t control, but can manage
This tour depends on favourable weather conditions. Confirmation comes within 48 hours of booking, subject to availability, so you should keep your schedule flexible near your intended day.
When weather is iffy, the day can shift. Reviews describe waiting until the last minute to confirm safety, plus timely updates when conditions changed. That’s fairly common with helicopter operations—if the margins aren’t there, they won’t send you.
Two practical things matter:
- Helicopter scheduling is strict. If you miss your confirmed departure time and the seat can’t be resold, there can be a full cost charge.
- If you’re canceled due to poor weather, you’ll get the option of an alternative date or a full refund.
So, treat it like the kind of plan that deserves buffer time around it. Don’t stack a tight drive itinerary with no backup. Give yourself room to absorb a reschedule.
Who this Tasman Glacier heli-hike fits best
This experience fits best if you:
- Want a true glacier hike with expert guidance, not a short photo stop
- Prefer a small group day with hands-on gear support
- Enjoy dramatic scenery from both the air and the ground
- Can dress for cold and walk carefully on uneven terrain
It’s also a great fit for first-timers. The gear is provided, the guide leads you across the ice, and the pacing is designed for safe traction and steady movement. If you’re comfortable with moderate physical effort and you’re willing to follow instructions, you’ll likely feel in control pretty quickly.
If you’re someone who hates unpredictable weather changes or needs a perfectly fixed schedule, consider whether you can handle the possibility of moving to another date. The experience rewards flexibility.
Should you book the Tasman Glacier Heli-hike?
Book it if you want the fast, premium route to the Tasman Glacier and you’re ready to pay for time saved, helicopter access, and full cold-weather gear. It’s built for people who want “glacier up close” in a single morning or afternoon, with serious scenery and a guide to translate what you’re seeing.
Skip it—or at least think twice—if your schedule is too tight to handle weather delays, or if you’re likely to arrive late and stressed. The tour is strict about departure timing because helicopters run on a tight timetable.
If you do book, set yourself up for success: pack your layers, bring sun protection, dress for cold with warm trousers, and arrive early so your helicopter experience feels calm from the start.
FAQ
How long is the Tasman Glacier Heli-hike?
The duration is approximately 3 hours.
Where does the tour start and end?
It starts at Mount Cook Airport on Mount Cook Road, Canterbury Region 7999, New Zealand, and ends back at the same meeting point.
What’s included in the price?
You get two scenic helicopter flights, a professional guide, quality leather boots and woolen socks, harness if required, crampons (and/or snow shoes in winter), adjustable walking poles, and a waterproof jacket plus over-trousers.
What should I bring for the hike?
Bring 3–4 layers of warm upper clothing, warm trousers (no jeans), sunglasses and sun protection, a hat and gloves, and drink and snacks.
Do I need crampons or snow shoes?
Crampons are provided, and snow shoes are used in winter. You’ll be fitted on arrival.
How big is the group?
The tour has a maximum of 11 travelers.
What weather conditions are required?
The experience requires favourable weather conditions. If it’s canceled due to poor weather, you’ll be offered an alternative date or a full refund.
What if I miss my departure time?
The tour can’t delay departure time due to strict helicopter scheduling. If you miss your confirmed departure and the space can’t be resold, you may be charged 100% of the cost.
Is there an age or fitness requirement?
You should have a moderate physical fitness level.
Can I cancel for a full refund?
Yes. You can cancel up to 24 hours in advance for a full refund, based on local time. Cancellation within 24 hours isn’t refundable.